
Table of Contents
The Critical Role of Moisture Testing in Epoxy Flooring
Concrete moisture mitigation for epoxy begins with accurate moisture testing according to ASTM F2170 and F1869 standards, which measure vapour emission rates from concrete slabs. Without this step, trapped moisture can cause coatings to blister, peel, and delaminate, leading to costly floor failure. We follow ASTM F2170, which uses in-situ probes to assess relative humidity within the slab, and ASTM F1869, which calculates the moisture vapour emission rate via calcium chloride testing. Our 100% solid epoxy systems are engineered to block moisture vapour and resist hydrostatic pressure from below the slab; their dense barrier also helps prevent mould growth and freeze-thaw damage, and low-VOC formulations support better indoor air quality in basement living spaces. Once the need for moisture testing is understood, the next step is recognizing the specific signs of moisture in the concrete.
Key Takeaways
- Visible signs of excess moisture in a concrete slab offer the earliest warning that an epoxy flooring installation requires extra preparation.
- When visible signs of moisture appear on a basement slab, quantifying the concrete’s moisture vapour emission rate becomes essential before applying any epoxy system.
- With the calcium chloride test complete, the next moisture check involves relative humidity testing under ASTM F2170.
- After interpreting your moisture test results, selecting a treatment that will effectively block moisture is the critical next step.
- The application of a moisture vapor barrier coating establishes the primary defense against moisture ingress in Alberta basement floors.
Recognizing Moisture Issues Before You Start
Visible signs of excess moisture in a concrete slab offer the earliest warning that an epoxy flooring installation requires extra preparation. White, powdery efflorescence deposits on the surface, dark damp patches that linger after the surrounding area appears dry, and persistent musty odors are three of the most common indicators we encounter in Alberta basements.
Concrete is naturally porous, acting like a wick that draws moisture up from the ground. When that moisture reaches the surface, it carries dissolved salts that form efflorescence, and it creates the damp conditions where mold can take hold. Using a vapour retarder compliant with ASTM E1745 below the slab helps manage moisture at the source before it enters the concrete, though many existing floors were poured without this safeguard.
Ignoring these warning signs before applying an epoxy coating creates a high risk of coating bond failure. Trapped moisture pushes against the impermeable epoxy film from below, causing peeling, blistering, and delamination. Mold growth hidden beneath the coating can also compromise indoor air quality over time.
Our experience shows that visual inspection alone cannot confirm whether moisture levels are low enough for a successful installation. Professional moisture testing, most commonly the calcium chloride test, provides the precise measurements needed to make an informed decision and select the correct preparation approach.
Step 1: Perform a Calcium Chloride Test (ASTM F1869)
When visible signs of moisture appear on a basement slab, quantifying the concrete’s moisture vapour emission rate becomes essential before applying any epoxy system. The calcium chloride test, performed to the ASTM F1869 standard, measures the volume of water vapour escaping from a concrete surface over a defined period.
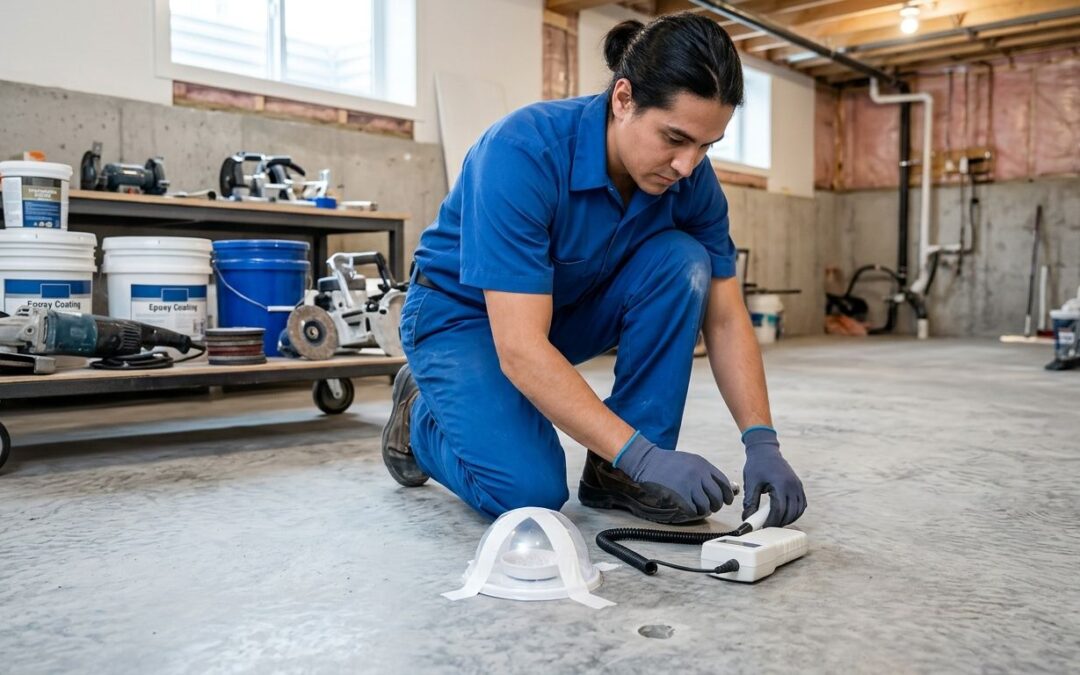
We perform this test by sealing a pre-weighed dish of calcium chloride under a protective dome on the prepared concrete. Over 60 to 72 hours, the desiccant absorbs moisture vapour rising through the slab, and final weight difference reveals the emission rate in pounds per 1,000 square feet per 24 hours. Results below 3 lbs indicate a substrate dry enough for a 100% solid epoxy coating to bond reliably, while higher readings signal that additional moisture mitigation strategies will be required.
Epo-Tech adheres to the ASTM F1869 protocol on every basement project to verify that the concrete can accept the coating without trapping vapour beneath it.
Step 2: Conduct Relative Humidity Testing (ASTM F2170)
With the calcium chloride test complete, the next moisture check involves relative humidity testing under ASTM F2170. Our technicians drill small holes into the concrete, insert in-situ relative humidity probes, and allow them to equilibrate before recording stable readings for accurate results. This direct measurement reveals the moisture vapour condition deep within the slab—a zone that can trap humidity even when the surface appears dry. That hidden moisture can later migrate upward and compromise the epoxy bond, causing blistering or delamination. Our standard preparation includes concrete relative humidity testing per ASTM F2170 in Edmonton to confirm that internal moisture levels are safe for coating. Once the readings are logged, we review them alongside the calcium chloride data in the following step to verify overall substrate readiness.
Step 3: Interpret Moisture Test Results
After moisture testing is completed using ASTM F2170 (in-situ relative humidity) or ASTM F1869 (moisture vapour emission), interpreting moisture test results for epoxy application becomes the step to determine the slab’s readiness for a 100% solid epoxy coating. We assess whether the measured moisture levels fall within the acceptable range for epoxy adhesion by comparing them to the epoxy system’s specified moisture tolerance and the relevant ASTM standard thresholds, ensuring the substrate can support a durable, long-lasting floor without risk of delamination or moisture-related failures. If the results indicate elevated moisture content, further mitigation is necessary before coating. Technical guidance from the Concrete Floor Construction Association points to vapour retarders compliant with ASTM E1745 as an effective measure for controlling slab moisture in these situations. Conversely, when readings confirm the slab is sufficiently dry, surface preparation and coating can proceed as planned. This interpretation shapes the choice of moisture treatment solution, which is addressed in the following stage.
Step 4: Choose a Moisture Treatment Solution
After interpreting your moisture test results, selecting a treatment that will effectively block moisture is the critical next step. We recommend a 100% solid epoxy system, which forms a non-porous membrane capable of resisting hydrostatic pressure and preventing moisture vapor from rising through the slab—a leading approach for concrete moisture mitigation for epoxy installations. Concrete is naturally porous, so leaving the slab untreated can lead to mold growth and flooring failure. To ensure a durable bond, proper surface preparation through diamond grinding is essential; this method opens the concrete’s pores far better than acid etching. Our installations follow ASTM standards for moisture testing and crack repair, providing a proven framework. As a complementary measure, a vapour retarder compliant with ASTM E1745 can be installed beneath the slab for comprehensive moisture management. Once you have chosen the right treatment, the next step is to apply a moisture vapor barrier coating.
Step 5: Apply a Moisture Vapor Barrier Coating
The application of a moisture vapor barrier coating establishes the primary defense against moisture ingress in Alberta basement floors. Concrete is naturally porous and susceptible to vapour transmission, which can lead to dampness and mold development in below-grade spaces. Applying a moisture vapor barrier coating creates a durable seal that stops water vapour from migrating through the slab.
We apply low-VOC, 100% solid epoxy systems that form a seamless, non-porous membrane capable of resisting hydrostatic pressure. These formulations improve indoor air quality, making them suitable for residential basements. Before any coating touches the concrete, surface preparation through diamond grinding opens the substrate pores to achieve a strong mechanical bond. We avoid acid etching, which can leave residues that interfere with adhesion on dense concrete.
ASTM F2170 or F1869 moisture testing must confirm acceptable vapour emission levels before application begins. Once the coating cures, verifying that moisture mitigation remains effective ensures the floor system’s long-term performance.
Step 6: Verify Moisture Mitigation After Curing
Verifying that a moisture vapour barrier has fully cured and is effectively blocking moisture is a critical checkpoint before continuing with any decorative epoxy application. Our technicians perform ASTM F2170 in-situ relative humidity testing or the ASTM F1869 anhydrous calcium chloride test to measure moisture vapour emission rates. These standard methods confirm that emissions stay below the threshold required for 100% solid epoxy adhesion, guarding against future blistering or bond failures. A passing result indicates the barrier is performing as designed, preventing sub-surface moisture from compromising bond strength or causing future discolouration. If test results reveal elevated moisture, additional curing time or supplementary mitigation measures are required before proceeding; skipping this step risks costly floor failures. Our process follows Epo-Tech’s standard procedure, which uses 100% solid epoxy systems that create a non-porous barrier, making this verification step a vital quality gate. With the moisture barrier verified, the surface is now ready for final preparation before applying epoxy.
Step 7: Prep the Surface for Epoxy Application
After moisture mitigation has been verified, we focus on creating an optimal surface profile that promotes a strong mechanical bond and prevents coating delamination. Our team follows a systematic process that has proven reliable for basement floors in Alberta’s challenging climate.
- Diamond Grinding: We use diamond grinding instead of acid etching because it creates a superior mechanical bond by mechanically abrading the slab to open pores. This removes laitance and contaminants without leaving chemical residues that can interfere with adhesion.
- Crack Repair: All cracks are repaired according to ASTM standards to restore monolithic slab integrity and prevent them from telegraphing through the new epoxy surface.
- Cleaning: After grinding, the floor is vacuumed and wiped meticulously to eliminate every trace of dust and debris, ensuring the epoxy primer adheres directly to clean concrete.
By investing in thorough preparation, we help ensure the finished epoxy floor resists the moisture-related failures discussed in the next section.
Troubleshooting Moisture-Related Epoxy Failures
Even with meticulous surface preparation, hidden moisture in concrete slabs is a leading cause of epoxy coating failures. Moisture vapour that migrates through untreated porous concrete can condense under the epoxy film, causing the coating to lose adhesion and eventually blister and peel. In worst cases, persistent dampness creates the ideal environment for mold growth beneath the floor—a concern we frequently encounter in Edmonton basements where clay soils and freeze-thaw cycles increase subsurface moisture.
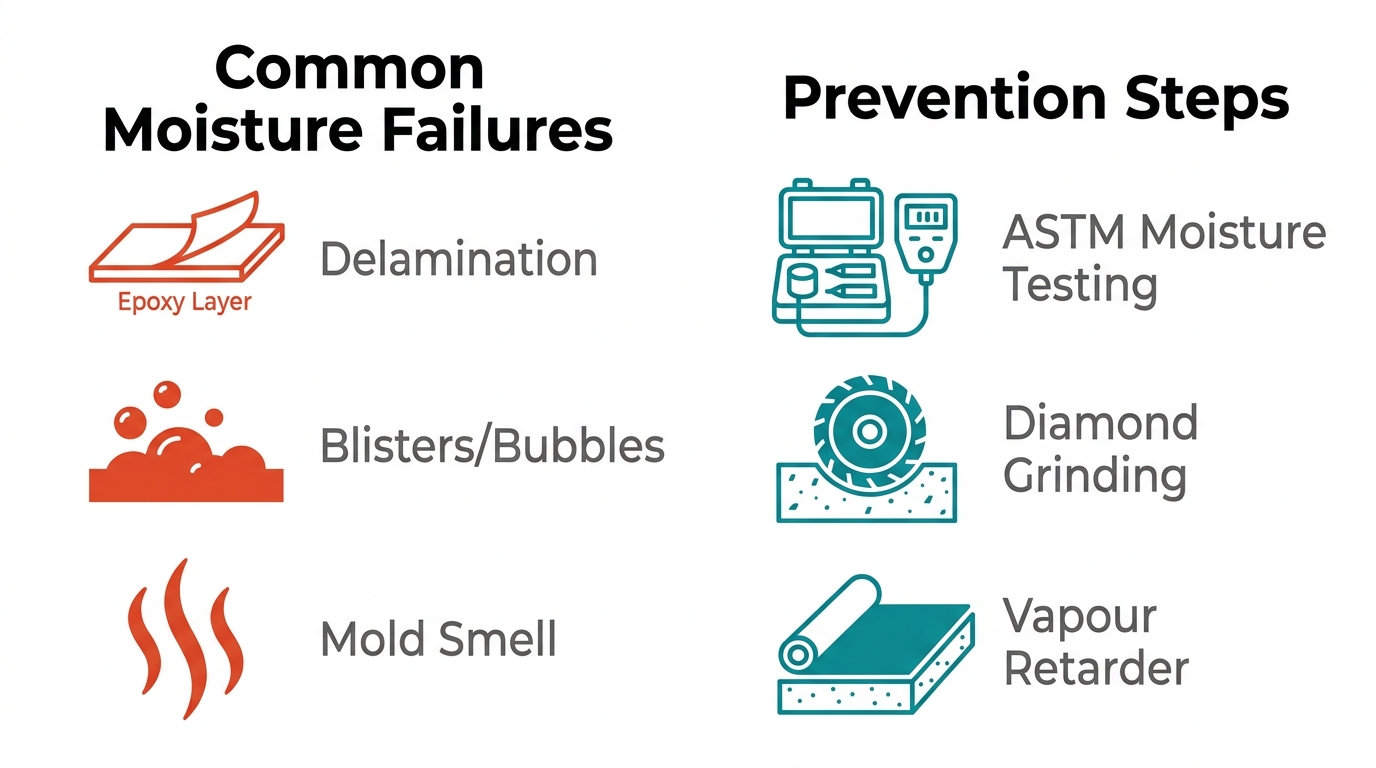
To avoid these failures, we require ASTM F2170 or F1869 moisture testing on every slab before coating. When emission rates exceed the flooring manufacturer’s limits, allowing the concrete to dry fully is essential. The Concrete Floor Construction Association notes that reducing the water-to-cement ratio to 0.40–0.45 and installing an ASTM E1745 vapour retarder beneath the slab can dramatically shorten drying times. Avoiding curing membranes and protecting the slab from re-wetting during construction further accelerates the process. For existing concrete, diamond grinding is our preferred preparation method because it opens surface pores without leaving chemical residues, creating a strong mechanical bond that acid etching cannot match. Once the substrate is dry and properly profiled, our Ultra 100% solid epoxy system forms a seamless, non-porous membrane that blocks water vapour and resists hydrostatic pressure.
Diagnosing and remediating these moisture issues before installation is the foundation for long-term epoxy performance. When we ensure the substrate is dry and properly prepared, the finished floor delivers durable protection and a healthier indoor environment.
Frequently Asked Questions
Why is moisture testing important before applying epoxy?
Moisture testing is important because trapped moisture in concrete can cause epoxy coatings to blister, peel, and delaminate. Concrete is naturally porous and draws moisture upward, breaking the bond. Epo-Tech uses ASTM F2170 and F1869 testing to measure vapour emission rates, ensuring the slab is dry enough for a durable 100% solid epoxy adhesion.
How do moisture vapor barriers prevent epoxy floor failure?
Moisture vapor barriers prevent epoxy floor failure by forming a seamless, non-porous membrane that blocks water vapour from rising through the concrete slab. This stops condensation under the epoxy film that would otherwise cause blistering and peeling. Epo-Tech applies low-VOC, 100% solid epoxy coatings that resist hydrostatic pressure, protecting the bond and preventing mould growth.
What are the signs of moisture-related epoxy peeling in basements?
Visible signs include blistering, peeling, and delamination of the epoxy coating. Before peeling occurs, white powdery efflorescence, dark damp patches, and persistent musty odors on the concrete indicate excess moisture. These warnings signal that moisture vapour is migrating through the porous slab, which will eventually push against the impermeable epoxy and cause bond failure.
How to treat high moisture levels in concrete before coating?
Treat high moisture levels by applying a 100% solid epoxy moisture vapor barrier after diamond grinding the surface to open pores for a strong mechanical bond. For comprehensive management, install a vapour retarder compliant with ASTM E1745 beneath the slab. Epo-Tech uses ASTM F2170 or F1869 testing to confirm moisture levels before proceeding with coating.
What is a calcium chloride test for concrete floors?
A calcium chloride test measures the moisture vapour emission rate from a concrete floor according to ASTM F1869. A pre-weighed dish of calcium chloride is sealed under a dome on the slab for 60 to 72 hours; the weight gain reveals the vapour emission in pounds per 1,000 square feet per 24 hours. Results below 3 lbs indicate a slab dry enough for epoxy coating.
Protecting Your Investment with Proper Moisture Management
As the troubleshooting examples show, moisture-related failures are avoidable with the right preparation. Concrete moisture mitigation for epoxy floors starts with professional moisture testing and surface preparation before any coating is applied.
We use ASTM F2170 and F1869 testing standards to evaluate moisture vapour levels in the concrete, ensuring the substrate is ready for a long-lasting bond. Our team then prepares the floor with diamond grinding, a dust-free method that opens concrete pores for superior adhesion. Once the surface is properly profiled, we apply 100% solid epoxy systems that form a seamless, non-porous membrane. This barrier blocks moisture vapour from rising through the slab, protecting both the concrete and the decorative finish from future damage.
For homeowners, that means a basement floor that resists efflorescence, mold, and freeze-thaw stress. Investing in these steps safeguards your epoxy flooring for years. Consult our team to assess your basement and design a moisture management plan tailored to your home.
Start Your Epoxy Flooring Project
You’ve now learned the essential steps for concrete moisture mitigation before applying epoxy, from initial testing to final surface preparation. The guide highlighted the importance of ASTM F2170 and F1869 standards for checking moisture levels, which must be completed to prevent coating failure. A 100% solid epoxy system, applied after proper diamond grinding, forms a non-porous barrier against hydrostatic pressure. Rather than navigating these technical steps alone, professional installation ensures every detail is handled correctly. Our team follows industry best practices, utilizing diamond grinding and moisture testing to deliver long-lasting, beautiful floors. Your investment in a durable epoxy floor starts with a consultation. Begin your project today with expert support from our team.
Start Your Epoxy Flooring Project